Building a Synthesiser - an introductory tutorial
for Reaktor v5.
Symple Synth: Graphics
... and that's our finished Two Oscillator Synthesiser. Now it's time to find a graphic designer to make it look cool. Perhaps you think I'm joking, but have a look at some of the Ensembles supplied with Reaktor and you'll see that there are credits for the graphic designers more often than not.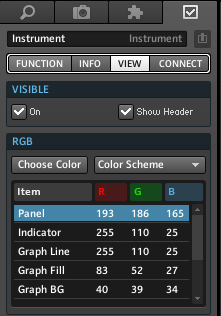 1. Find your way
to the VIEW tab of the instrument itself and change the
colours. The image on the left shows some of the colours I chose.
1. Find your way
to the VIEW tab of the instrument itself and change the
colours. The image on the left shows some of the colours I chose.2. If you unlock the panel, right
click and select Insert Built-In Module>Picture, you can add a
picture of your choice to the blank space in the lower centre of your
synth. You can also use a picture as the background. In fact, you can
use the Properties VIEW graphic panel for every knob and fader,
changing not only the size but also whether or not there's a scale
displayed, or just a groove, or nothing at all (you can use your own
graphics here, too).
The completed Ensemble is pictured
on the first
page of this tutorial. If you right click the picture you'll find it
links to the Ensemble file. Feel free to download, copy and pass around
this tutorial with my blessing. All I ask it that you distribute it
without changing it.